Intro
In this guide we will create a Windows 10, OpnSense and a Debian 12 node.
The official notes can be found on EVE-NG’s website:
https://www.eve-ng.net/index.php/documentation/howtos/
There are guides on how to add and create all available nodes on EVE-NG. So it is recommended to have a look at them in order for you to add the nodes you require.
Node VM Creations
Download the ISO’s
Download the desired ISO’s. In my case I have downloaded:
OpnSense 24
Windows 10 (64 bit)
Debian 12 (net Installer)
Create the folders on EVE-NG
SSH into the EVE-NG machine and create a folder in the:bash /opt/unetlab/addons/qemu/
folder
For example I created the following:
mkdir /opt/unetlab/addons/qemu/win-10x64Pro/
mkdir /opt/unetlab/addons/qemu/linux-debian-12/
mkdir /opt/unetlab/addons/qemu/opnsense-24/
Copy the ISO’s to the folders
Next I will use SCP to copy the ISO’s. from my downloads folder into the desired folder we have created for the VM’s.
It is important that we name the ISO cdrom.iso when we add it to the folder. Here are my SCP commands
OpnSense:
scp /Users/jono/Downloads/OPNsense-24.1-dvd-amd64.iso root@10.0.0.9:/opt/unetlab/addons/qemu/opnsense-24/cdrom.iso
Debian 12:
scp /Users/jono/Downloads/debian-12.6.0-amd64-netinst.iso root@10.0.0.9:/opt/unetlab/addons/qemu/linux-debian-12/cdrom.iso
Windows 10:
scp /Users/jono/Downloads/Win10_22H2_EnglishInternational_x64v1.iso root@10.0.0.9:/opt/unetlab/addons/qemu/win-10x64Pro/cdrom.iso
Create The Virtual Disks (HDD’s) for the VM’s
Next we need to create the virtual disks for each VM / Node to use.
SSH into the EVE-NG again and do the following:
OpnSense:
cd /opt/unetlab/addons/qemu/opnsense-24/
/opt/qemu/bin/qemu-img create -f qcow2 virtioa.qcow2 10G
Debian 12:
cd /opt/unetlab/addons/qemu/linux-debian-12/
/opt/qemu/bin/qemu-img create -f qcow2 virtioa.qcow2 30G
Windows 10:
cd /opt/unetlab/addons/qemu/win-10x64Pro/
/opt/qemu/bin/qemu-img create -f qcow2 virtioa.qcow2 60G
Installing the OSes on the VMs / Nodes
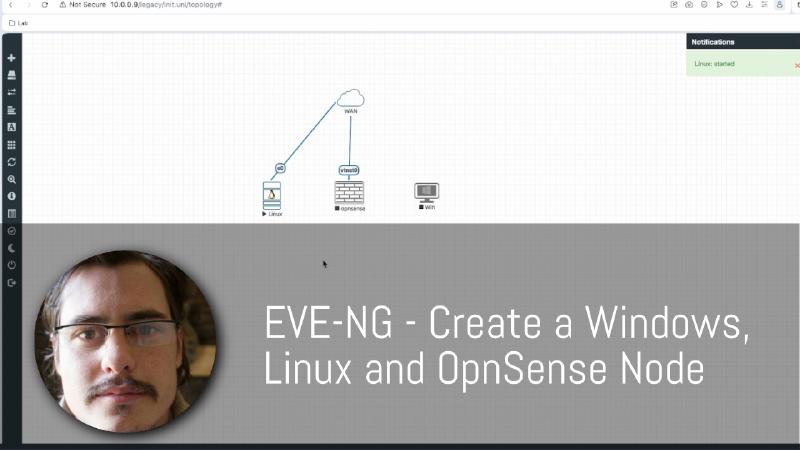
- Log In to EVE-NG Using the “HTML 5” session.
- Create a new lab and add the newly created nodes.
- Connect the node to your home LAN cloud/internet in order for it to be able to get updates and fully install from the internet. However, do not add the Windows 10 node to the internet, this will just quickly allow us to bypass the “Online Microsoft Account” link stage.
- start each node and complete the installation of. the OSes.
- Once completed, Shutdown and stop each node.
Commit VM’s
Check lab ID number on EVE side bar “Lab details” and we need to also get the “Node Number”. number of each node which can be seen in the “Nodes” List
SSH into the EVE-NG machine and
cdinto the labs folder.
cd /opt/unetlab/tmp/0/the-lab-id-here/
- We will go into the nodes one by one and convert the temp VM to be the “main” vm for all future nodes of that type. For example
cd /opt/unetlab/tmp/0/the-lab-id-here/0/
qemu-img commit virtioa.qcow2

cd /opt/unetlab/tmp/0/the-lab-id-here/1/
qemu-img commit virtioa.qcow2

cd /opt/unetlab/tmp/0/the-lab-id-here/2/
qemu-img commit virtioa.qcow2
Removes ISO’s from the machine
Now we need to cd into each the VM folders again and remove the ISO images.
OpnSense:
cd /opt/unetlab/addons/qemu/opnsense-24/
rm -f cdrom.iso
Debian 12:
cd /opt/unetlab/addons/qemu/linux-debian-12/
rm -f cdrom.iso
Windows 10:
cd /opt/unetlab/addons/qemu/win-10x64Pro/
rm -f cdrom.iso
Fix file Permissions
lastly we need to run the following to fix any permission issues
/opt/unetlab/wrappers/unl_wrapper -a fixpermissions
Optional - Compress the VM’s HDD’s
- You can
cdinto each VM’s folder again and sparsify the virtual disk to compress the them, for example to compress the windows 10 VM we will do the following:
cd /opt/unetlab/addons/qemu/win-10x64Pro/
virt-sparsify  --compress virtioa.qcow2 compressedvirtioa.qcow2
This will take some time and another compressed image will be created in the same image directory
- Rename the original image to virtioa-o.qcow2:
mv virtioa.qcow2 virtioa-o.qcow2
- Rename the compressed image name to virtioa.qcow2:
mv compressedvirtioa.qcow2 virtioa.qcow2
- now you can test your new compressed image on a lab, just wipe the node and start it.
If the compressed node works fine, you can delete your original source image:
rm -f. virtioa-o.qcow2
Please note I tried to compress windows 10 and when using it, it would not boot correctly. I attempted this twice and had issues. So I reverted to use the original virtual disk.
WebUI Access Method
To setup OpnSense web UI from wan
- in shell on opnsense:
pfctl -d - You ca now access GUI via WAN IP
- disable the “Block bogon” traffic:
- interfaces->WAN “Untick” both “block private networks” and block “Bogon Networks”
- I would also go to Firewall > Settings > Advanced and check “Disable anti-lockout”.
- Firewall –> Settings–> Advanced “Disable reply-to on WAN rules”
- create the following Firewall rule.
Firewall > Rules > WAN

Click on the "+" to add a rule. Add this rule:

Action: allow
Source: any
Destination: This Firewall
Destination port: 443